

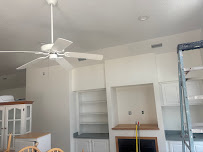
When planning an interior renovation or new construction project in Kill Devil Hills, most homeowners focus on paint colors and finish options without considering what happens before the first brushstroke. The truth is, your interior painting results depend heavily on the quality of drywall installation beneath that paint. A flawless paint job starts with properly installed, finished, and prepared drywall surfaces that create the smooth canvas your walls deserve.
Whether you’re renovating a beach cottage near the ocean or updating a year-round residence in Kill Devil Hills, understanding the relationship between drywall work and painting helps you achieve professional results that last. The coastal climate here presents unique challenges for both drywall and paint, making proper installation and preparation even more critical. This guide walks you through what quality drywall installation looks like and how it directly impacts your interior painting outcomes.
Why Drywall Quality Matters Before Any Paint Touches Your Walls
The foundation of any beautiful interior paint job begins with the drywall itself. Even the highest quality paint and the most skilled painter in Kill Devil Hills, NC cannot hide poorly installed drywall. Visible seams, uneven surfaces, dimples from improperly set fasteners, and rough texture all telegraph through paint, especially in natural light or with satin and semi-gloss finishes.
Professional drywall installation involves precise measurement, proper fastening techniques, and expert finishing that creates seamless transitions between panels. The hanging process must account for structural elements, ensure proper spacing for expansion and contraction, and position seams strategically to minimize visibility. In coastal areas like Kill Devil Hills, installers must also consider humidity factors that affect how drywall panels perform over time.
Once panels are hung, the finishing process determines what your painter will work with. This involves multiple coats of joint compound, careful sanding between coats, and attention to corners, edges, and fastener dimples. Rushed finishing work creates texture inconsistencies that become glaringly obvious once paint is applied. Taking time during the drywall phase saves significant frustration and cost later during painting.
The Multi-Step Process That Prepares Walls for Premium Interior Painting
Proper Taping and Mudding Techniques
After drywall panels are secured, joints between panels must be reinforced with tape and covered with joint compound, commonly called mud. This process typically requires three separate coats, each wider than the last, to create imperceptible transitions. The first coat embeds the tape and fills the joint, the second coat widens the coverage area, and the third coat feathers the edges to blend with surrounding wall surfaces.
Corner beads protect outside corners and create crisp lines, while inside corners require careful taping and finishing to maintain sharp angles without buildup. Fastener holes must be filled and smoothed so they disappear completely. Each coat must dry completely before the next application, and sanding between coats removes ridges and imperfections. Shortcuts during this phase guarantee visible defects once your interior painting service applies the first coat of primer.
Priming as the Bridge Between Drywall and Paint
Even perfectly finished drywall requires primer before paint. Primer serves multiple essential functions that directly impact your final paint appearance. It seals the porous drywall paper and dried joint compound, creating a uniform surface that allows paint to adhere properly and appear consistent across the entire wall.
Without primer, paint absorbs unevenly into bare drywall and joint compound areas, creating a blotchy appearance called flashing. Different absorption rates mean you’ll see dull spots where paint soaked into unsealed drywall and shinier areas over joint compound. Quality primers also improve paint coverage, potentially reducing the number of finish coats needed and saving both material and labor costs.
Common Drywall Installation Mistakes That Ruin Interior Paint Jobs
Understanding what can go wrong during DryWall Installation Kill Devil Hills, NC helps you recognize quality work and avoid costly do-overs. One frequent mistake involves overdriving fasteners, which breaks the paper surface and creates weak points that may show through paint or even pop later. Fasteners should sit just below the surface without tearing the paper, creating a small dimple that’s easily filled.
Another common problem occurs when installers fail to stagger seams properly. Aligning seams creates structural weak points and makes joints more visible. Professional installation staggers seams in a brick-like pattern that distributes stress and hides transitions. In Kill Devil Hills’ coastal environment, improper moisture barriers behind drywall can also lead to problems that eventually affect both the drywall and any paint applied over it.
Insufficient sanding between finishing coats leaves ridges and texture that become obvious under paint, particularly with lighting that rakes across wall surfaces. Some installers rush through sanding or skip it entirely on upper coats, assuming paint will hide minor imperfections. The reality is that paint accentuates these flaws rather than concealing them. A painter in Kill Devil Hills, NC working over properly prepared drywall will achieve dramatically better results than even the most skilled professional working over substandard surfaces.
How Coastal Conditions in Kill Devil Hills Affect Both Drywall and Paint
Living on the Outer Banks means dealing with higher humidity levels, salt air, and temperature fluctuations that impact building materials differently than inland locations. Moisture is particularly challenging for drywall, as it can cause swelling, deterioration of the paper facing, and eventual failure if not properly managed. This makes moisture-resistant drywall essential in bathrooms, kitchens, and other high-humidity areas.
The relationship between humidity and paint is equally important. Paint applied over drywall that hasn’t properly acclimated to local humidity may fail prematurely through blistering, peeling, or poor adhesion. Professional drywall installation in coastal areas accounts for these factors by allowing materials to acclimate before installation and ensuring proper ventilation during finishing and painting phases.
Salt air can also accelerate corrosion of metal components like corner beads and fasteners if inferior materials are used. Quality installations use corrosion-resistant fasteners and materials designed for coastal applications. When selecting an interior painting service, verify that they understand these local conditions and specify appropriate primers and paints formulated to perform in coastal environments.
Choosing the Right Finish and Paint for Your Newly Installed Drywall
Once your drywall installation is complete and properly primed, selecting appropriate paint finishes for different rooms maximizes both appearance and durability. Flat finishes hide minor surface imperfections best but are harder to clean, making them ideal for low-traffic areas like bedrooms and ceilings. Eggshell and satin finishes offer better washability while still providing some forgiveness for slight texture variations.
Semi-gloss and gloss finishes reflect more light, which makes them more durable and easier to clean but also highlights any remaining surface imperfections. These finishes work well in kitchens, bathrooms, and trim work where cleanability matters most. However, they demand near-perfect drywall preparation since they’ll reveal flaws that flatter finishes might hide.
Paint quality matters significantly in coastal areas. Higher-quality paints contain better binders and pigments that resist fading from UV exposure, hold up to humidity, and resist mildew growth. While premium paints cost more initially, they typically last longer and look better throughout their lifespan, particularly over properly installed and finished drywall that provides an ideal substrate.
Final Thoughts on Creating Beautiful Painted Interiors
The connection between quality drywall installation and successful interior painting cannot be overstated. These two elements work together to create the beautiful, durable wall surfaces that transform your home’s interior spaces. Cutting corners during the drywall phase creates problems that no amount of painting skill can fully overcome, while investing in professional installation creates the perfect canvas for stunning paint results.
For homeowners in Kill Devil Hills seeking both expert drywall installation and interior painting services, working with experienced local professionals who understand coastal construction challenges makes all the difference. Scotts Drywall has helped numerous Outer Banks residents achieve flawless wall finishes by combining proper installation techniques with quality materials suited for the coastal environment. Whether you’re building new or renovating existing spaces, starting with properly installed drywall ensures your interior painting investment delivers the beautiful, lasting results you envision.
Frequently Asked Questions
How long should I wait between drywall installation and painting?
After final sanding, you should wait at least 24 hours before priming to ensure all joint compound has fully dried. Primer needs another 24 hours before applying finish paint. However, in humid coastal conditions, allowing an extra day between steps helps prevent moisture-related problems. Rushing this timeline can cause paint adhesion issues and uneven finish appearance.
Can I paint directly over new drywall without primer?
You should never skip primer on new drywall. Primer seals the porous surfaces and creates uniform absorption across paper and joint compound areas. Without it, you’ll experience flashing where different materials show through paint unevenly. Primer also improves paint adhesion and coverage, actually saving money by reducing the number of finish coats needed for full coverage.
What type of drywall should I use in Kill Devil Hills bathrooms?
Moisture-resistant drywall, often called green board or purple board, is essential for bathrooms and other high-humidity areas in coastal homes. These products have water-resistant cores and paper facings that withstand moisture exposure better than standard drywall. For shower surrounds and areas with direct water contact, cement board provides even better moisture protection before tile installation.
Why do I see seams through my paint after a few months?
Visible seams appearing later typically indicate insufficient joint compound application or inadequate feathering during finishing. As homes settle and materials respond to humidity changes, inadequately finished joints may crack slightly or become more visible. This problem stems from the drywall finishing phase, not the paint itself. Proper finishing with multiple coats properly feathered prevents this issue.
Should the same company handle both drywall installation and painting?
While not required, having one company handle both services often produces better results through improved communication and accountability. The drywall crew knows exactly what finish level the painters need, and if any issues arise, there’s no finger-pointing between separate contractors. Companies offering both services also understand how preparation directly impacts final appearance, motivating careful work at every phase.